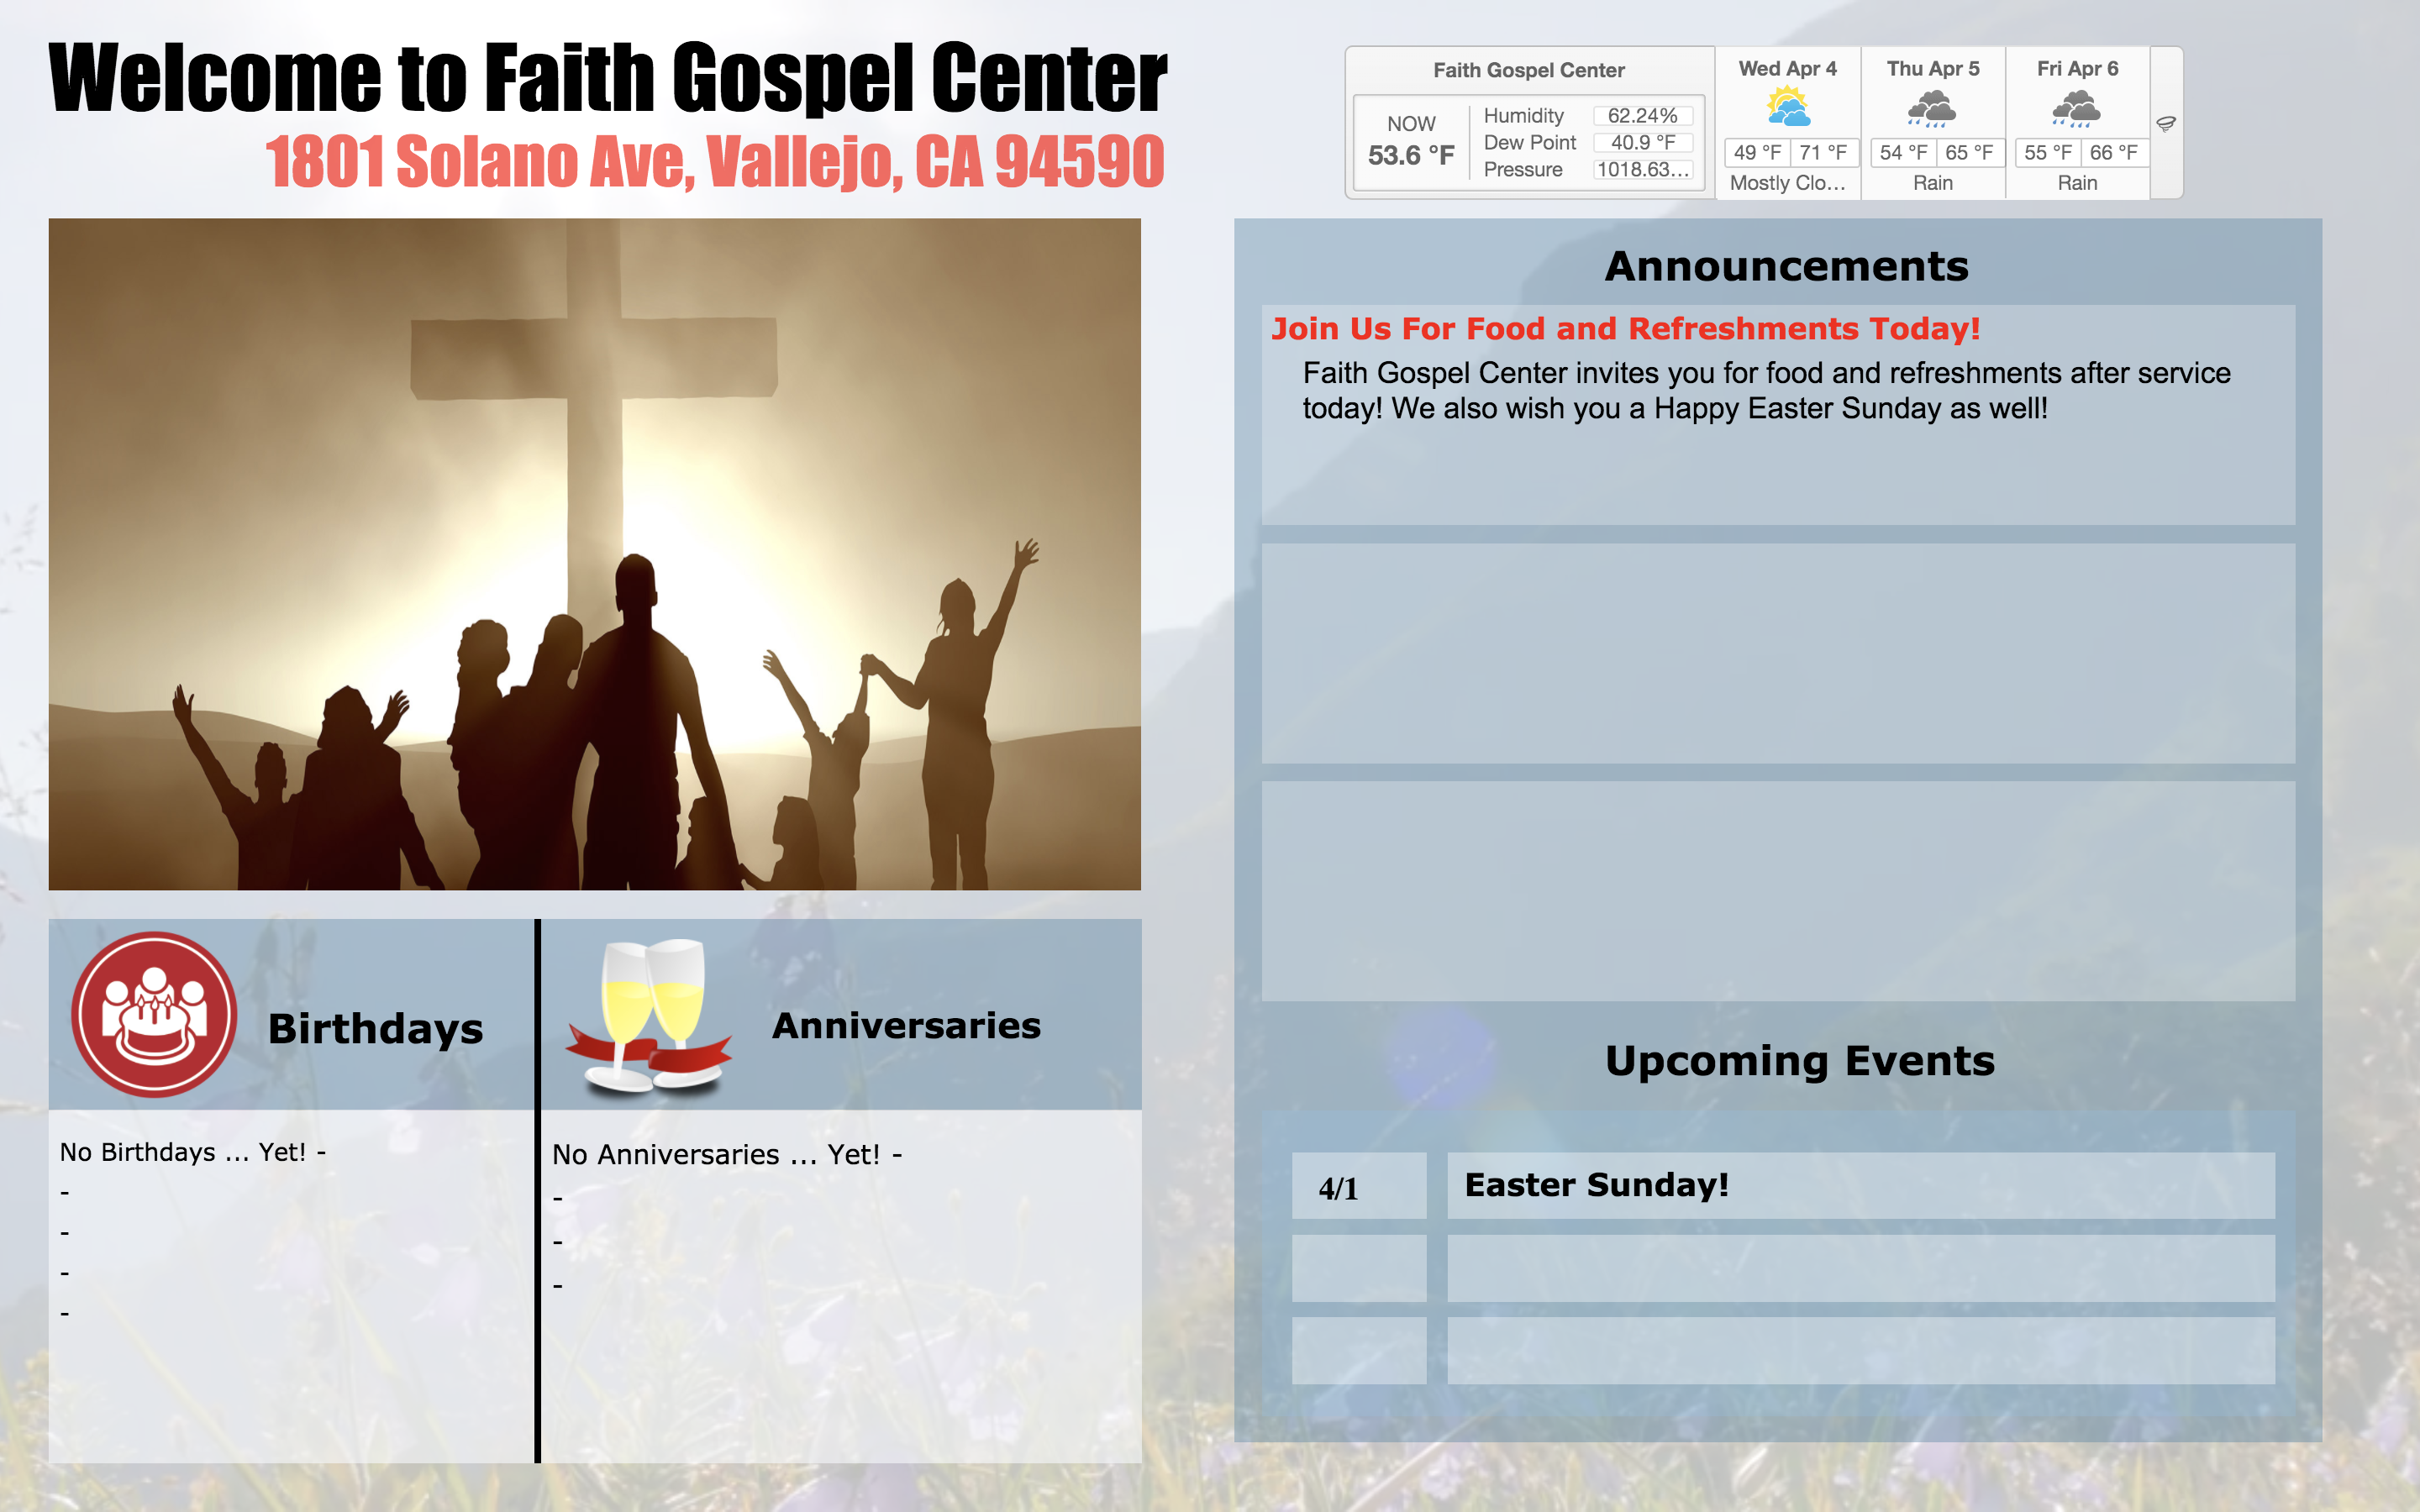
 An example of my digital signage used for a lobby display at a church while using the Google Firebase API to have a live announcement/event feed.
DISCLAIMER: Digital signage's live event/announcement feature works only when connected to WiFi, or else you will need to input static events/announcements.
This local website is used as a digital signage (also could be named as a kiosk display) in which you could display it on a large monitor in a public reception/lobby area. For lightweight purposes and stealth, the signage is run locally on a Raspberry Pi running Raspbian OS. The signage is also loaded in full-screen automatically as the Raspberry Pi boots up. The current files on this repository works best with a 1920x1080p monitor display.
-
Import respository onto Raspberry Pi's desktop directory (or any directory of your choice).
-
Whether you are accessing your Raspberry Pi remotely or locally, you will need to program it to start the webpage on boot. So follow these instructions:
- Open the Raspberry Pi Command Line Terminal
- Run the following command
nano /home/pi/.config/autostart/kiosk.desktop- Add the following lines then save. This will program the Raspberry Pi to run the following script on startup.
[Desktop Entry] Type=Application Name=Kiosk Exec=/home/pi/kiosk.sh X-GNOME-Autostart-enabled=true- Now we are going to create the script. (Credits to Pat from O'Briens Lab)
#!/bin/bash

# Run this script in display 0 - the monitor
export DISPLAY=:0

# Hide the mouse from the display
unclutter &

# If Chrome crashes (usually due to rebooting), clear the crash flag so we don't have the annoying warning bar
sed -i 's/"exited_cleanly":false/"exited_cleanly":true/' /home/pi/.config/chromium/Default/Preferences
sed -i 's/"exit_type":"Crashed"/"exit_type":"Normal"/' /home/pi/.config/chromium/Default/Preferences

# Run Chromium and open tabs
/usr/bin/chromium-browser --window-size=480,320 --kiosk --window-position=0,0  [INSERT HTML PATH HERE]

# Start the kiosk loop. This keystroke changes the Chromium tab
# To have just anti-idle, use this line instead:
# xdotool keydown ctrl; xdotool keyup ctrl;
# Otherwise, the ctrl+Tab is designed to switch tabs in Chrome
# #
while (true)
 do
   xdotool keydown ctrl+Tab; xdotool keyup ctrl+Tab;
   sleep 15
 done
Before you save the script, make sure to include the file path of the HTML location. (i.e. /home/pi/Desktop/RepoNameHere/index.html)
- If you have a brand new Raspberry Pi and you haven't installed MS Core Fonts, please do so with the following command:
sudo apt-get install ttf-mscorefonts-installer -
Now that the digital signage can boot from startup we have to link your own Google Firebase data with the locally run webpage.
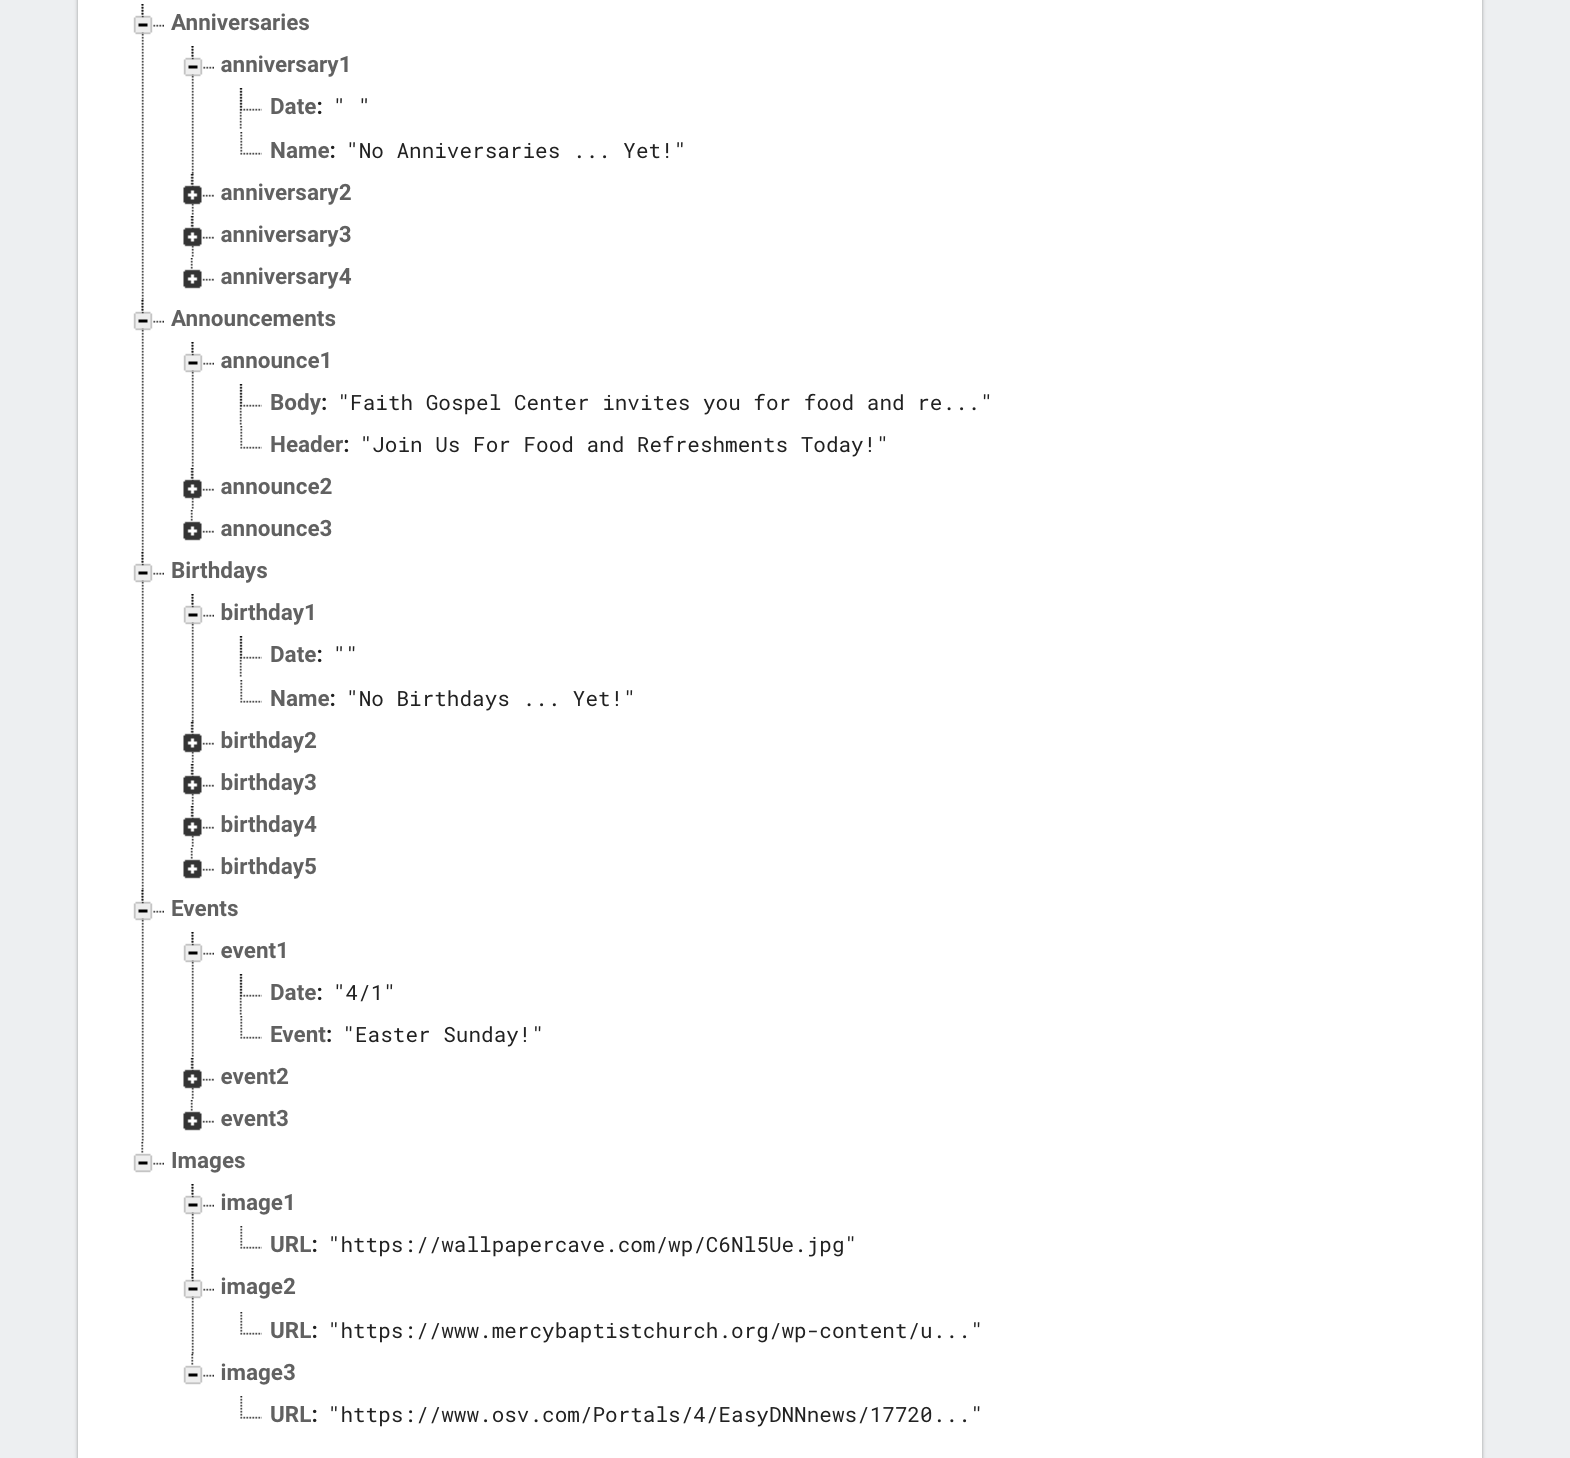 My database used for this example looks something like this, and I strongly suggest using this format so that the scripts will run properly.
- The main part of this is to make sure that your API key is set up. Your Firebase key should look something similar to:
<script src="https://www.gstatic.com/firebasejs/4.12.1/firebase.js"></script> <script> // Initialize Firebase var config = { apiKey: "UNIQUE KEY HERE", authDomain: "DOMAIN NAME HERE", databaseURL: "URL HERE", projectId: "ID NAME HERE", storageBucket: "ANOTHER LINK HERE", messagingSenderId: "ANOTHER ID HERE" }; firebase.initializeApp(config); </script> -
Your digital signage should all be set up!