Welcome to the Game Store project! This application allows users to buy games and merchandise, enroll in events, write reviews, add friends and family members, and much more. The application also includes an admin panel for managing various aspects of the platform, such as orders, games, merchandise, events, and game reviews.
Below you can find a complete list of screencaptures of all the functionality implemented in this project.
- Customer functionality:
- Add items to a cart or wish list
- Buy games or merchandise
- Enroll in events
- Add friends and family members
- Manage orders
- Update payment information
- Change address and other personal information
- Write and manage game reviews
- Rate products
- Admin functionality:
- Manage games, merchandise, and events
- Approve and manage customers' orders
- Approve game reviews
- Generate sales reports
- C#
- ASP.NET CORE 5.0 MVC
- MSSQL
- MFA authentication
- Admin panel
- Captcha validation
- Filtering
- Search
- Friends list
- CRUD operations
- Reporting
To get started with the project, clone the repository from GitHub:
git clone https://github.com/furs1da/GameStore.git
Ensure you have the following software installed:
- Visual Studio 2019 or later
- .NET 5.0 SDK
- MSSQL Server 2019 or later
-
Open the solution file (
GameStore.sln) in Visual Studio. -
Update the connection string in the
appsettings.jsonfile to connect to your MSSQL Server instance. -
Build the solution (Ctrl + Shift + B).
-
Run the application by pressing F5.
If you'd like to contribute to the Game Store project, please follow these steps:
- Fork the repository on GitHub.
- Create a branch for your feature or bugfix.
- Commit your changes to your branch.
- Push your changes to your fork on GitHub.
- Create a pull request against the main repository.
This project is licensed under the MIT License. See the LICENSE file for more information.
If you encounter any issues or have questions, please open an issue on the GitHub repository.
Thanks to everyone who contributed to the development of the Game Store project. We appreciate your support!
The Scientia Ludo’s is brought you by Retail Operations. They are a company who wants to increase the amount of online game sales for customers. And focusing on creating the online “Insiders Club” which has our member -only feature available. These insiders club also provides features of attracting various customers. Currently Mr. Adey the vice president of the Retail Operations had the same perspective as us Scientia Ludo’s where the customer is having to use our website easily and effectively without any difficulties.

Game Zone is an application where you could shop your own online/physical copies games, which is free to download and install once you are a member of the Game Zone. This faculty also enables users to add their friends and families so they could enjoy playing specific games with them and allow them to share to any platform for show casing their games. As you can see there is a game catalog over here which says the name of the game, categories of the specific game, platform game features and prices as well. And this game catalog has many games from which our members can choose from. There is also a wish list button enabling the user/ member to add to the wish list as many as they want to.
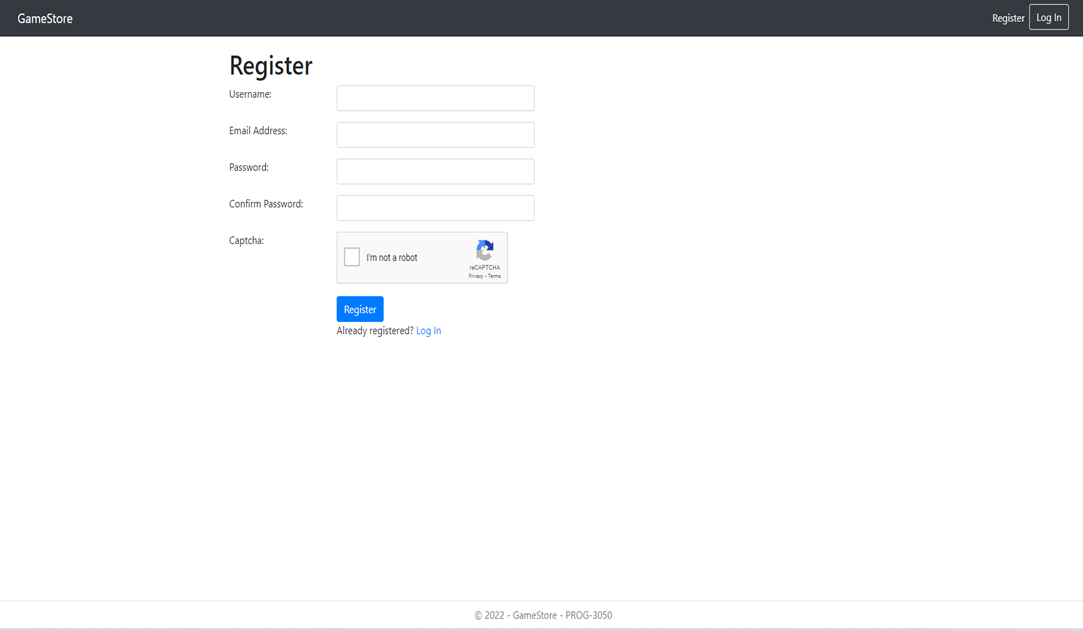
This Register Page allows new users to log in through the system using it and all of them are required to entered by the user.
-
Username: Which asks the user to put in your full name or your first name or last name. It doesn’t specifically need to be your full name.
-
*Email Address: This field is for user to provide the right email address or valid email address. If not provided with valid email-address the user will not be able to register and show validations regarding entering the correct email address. *
-
Password: The user should have password which has at least one lowercase letter, one uppercase letter, one digit, one special character, and is at least eight characters long.
-
Confirm Password: They are the security type password for user to not have entered wrong password which he wished for in the previous one.
-
*Captcha Validation: This makes ensure that a valid person or a human being is entering the information and not any robot or mechanism is entering false information, this helps us from spam and password decryption. *
-
Register Button: Click The “Register” to register as a new user and go to the next page.
-
*Already Registered? Log In: The “Log In” link brings you directly to the login page if you already have an existing account on the website. *
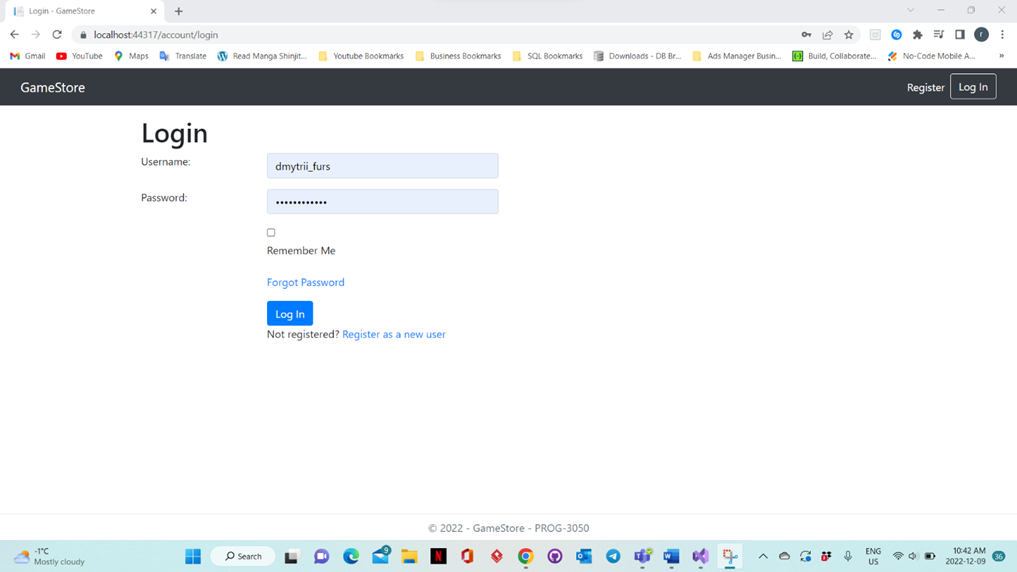
The Log in Page is for the user who is already registered with us and is already member of our Game Zone Web App.
Users who have used the register page to register may enter their information:
-
Username: User is required to enter the same username used in the register page to log in.
-
Password: User is required to enter the same password used in the register page to log in.
*IF THE INFORMATION NOT ENTERED PROPERLY WILL HAVE VALIDATION ERRORS*
-
The “Remember Me” checkbox is optional as to save your information in the current system so its easier for you to login and not type the information twice.
-
*The Register as a new user allows user to go back to the REGISTER Page to register once again as a new user. *
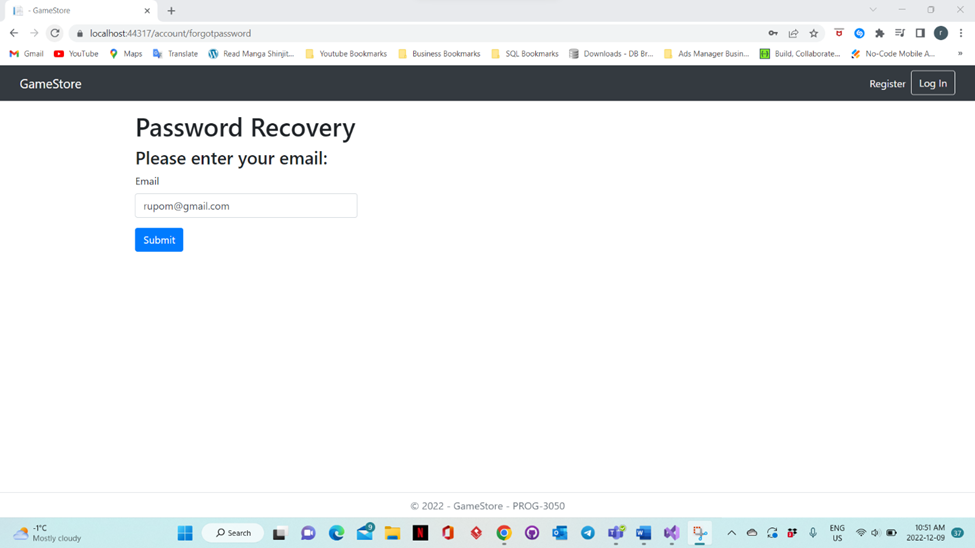
This page shows whenever you forgot your password in the Log in page previously you can easily change the password once again by typing in a VALID Email Address. Then Click “Submit” Button so that you have received the link to change the password successfully.
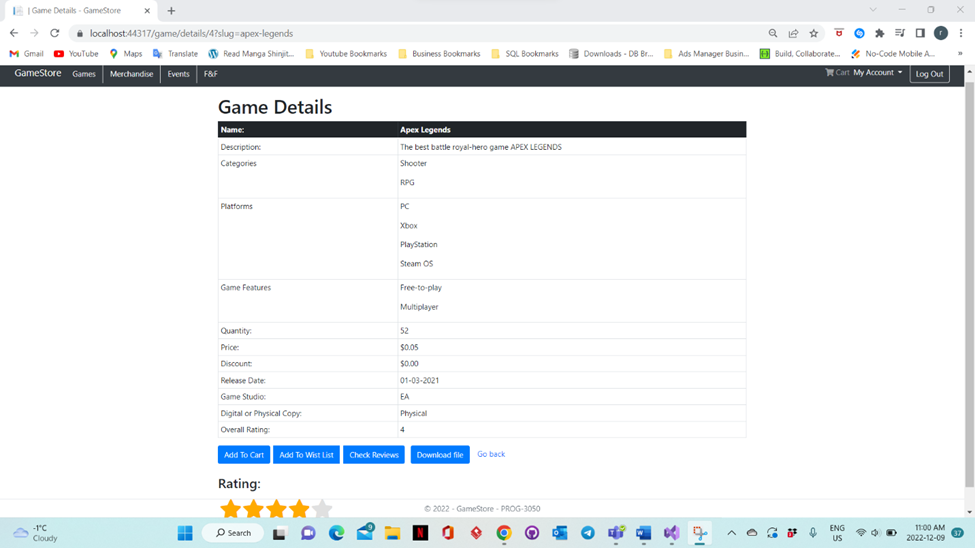 The Game Details Page Can be navigated by clicking the Details Button
once you are at the home page which is also known as the Game Catalog
Page.
The Game Details Page Can be navigated by clicking the Details Button
once you are at the home page which is also known as the Game Catalog
Page.
So as for in this page we can see information regarding the specific game you have chosen to view their details.
As For the Function of these buttons here, we have:
-
*Add To Cart: This allows user to add this game to the Cart. And later can view them by going to the Cart Page. *
-
Add To Wish List: This allows user to add this game to their wish list. And later can view them by going to the Wish List Page.
-
Check Reviews: This allows user to go to the check reviews page.
-
Download File: This allows user to download the list of the detail of this specific game to their system as a .txt file.
-
*Go Back: Takes the user back to the Game Catalog or the User Home Page. *
-
*Rating: It is a function for the user to give ratings according to their taste and saves the rating given by the user into the system. *
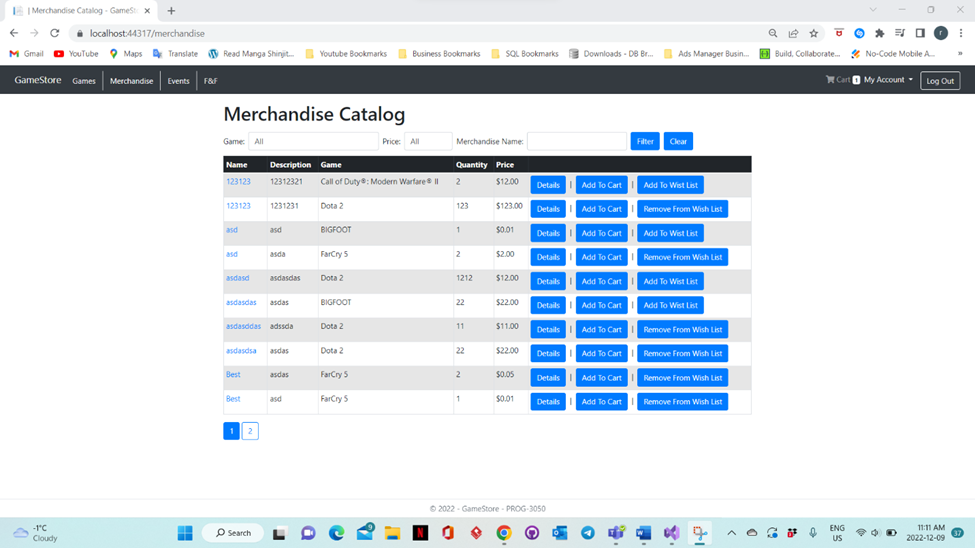
Merchandise Catalogue Page is the page that allows user to view the merchandise available in our Game Zone Store.
We have various features in this page as per:
-
We have option to use the “Filter” Button and can enter the name of the game directly so the user can find the specific game, once pressed the filter button.
-
The “Clear” Button clears all the filtering option done by the user to DEFAULT options.
-
Details: This takes the user to details of the specific Merchandise the user chooses.
-
*Add To Cart: This adds the current merchandise selected by the user to place in the cart. *
-
Add To Wish List: This adds the current merchandise selected by the user to place in the wish list of the member/user.

This page is for the user to display the merchandise details for the specific merchandise the user/member have selected.
There also buttons which work as provided:
-
Add To Cart: This is the same as the button we had in our main Merchandise Catalogue Page where you could add your specific merchandise to your cart.
-
Add To Wish List: Whereas mentioned in the merchandise catalogue page this also adds to your wish list and updates your wish list by adding the specific merchandise you have chosen.
-
Back: This Button take you back to the Merchandise Catalog Page.
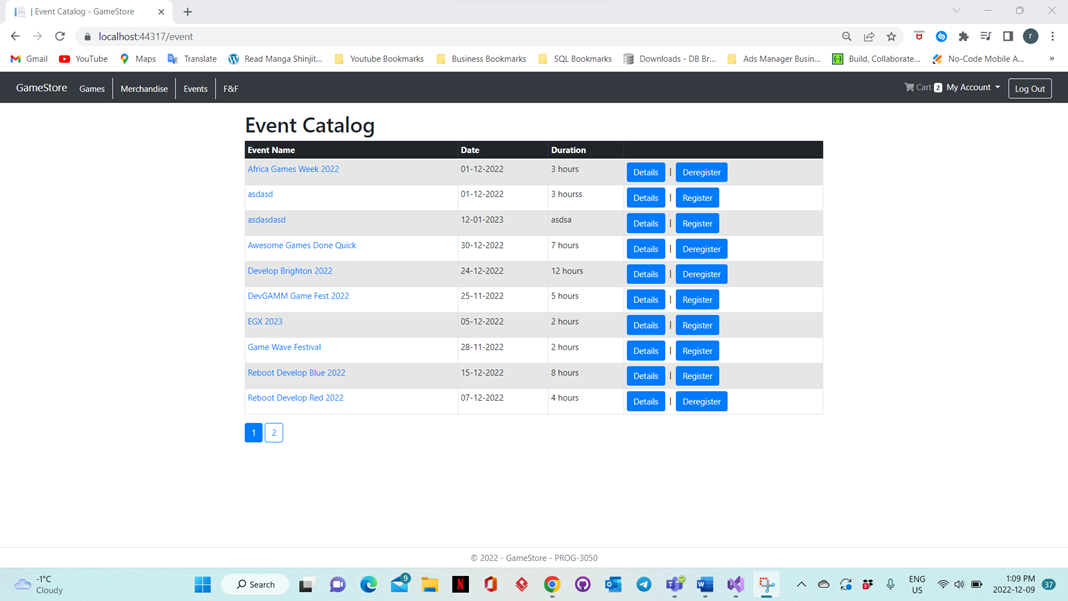
In this page its listed as per above the events been conducted during the specific date and mentioning how long will the event be held for.
These specific buttons are used for:
-
*Details: This is to get you to go to the Events Details Page. *
-
Register: This allows user to register for the specific event which will let you know late time that you have register for this upcoming event.
-
Deregister: This Button specifically undo’s the changes or you could say the user to have a change of mind and to not attend the event anymore.
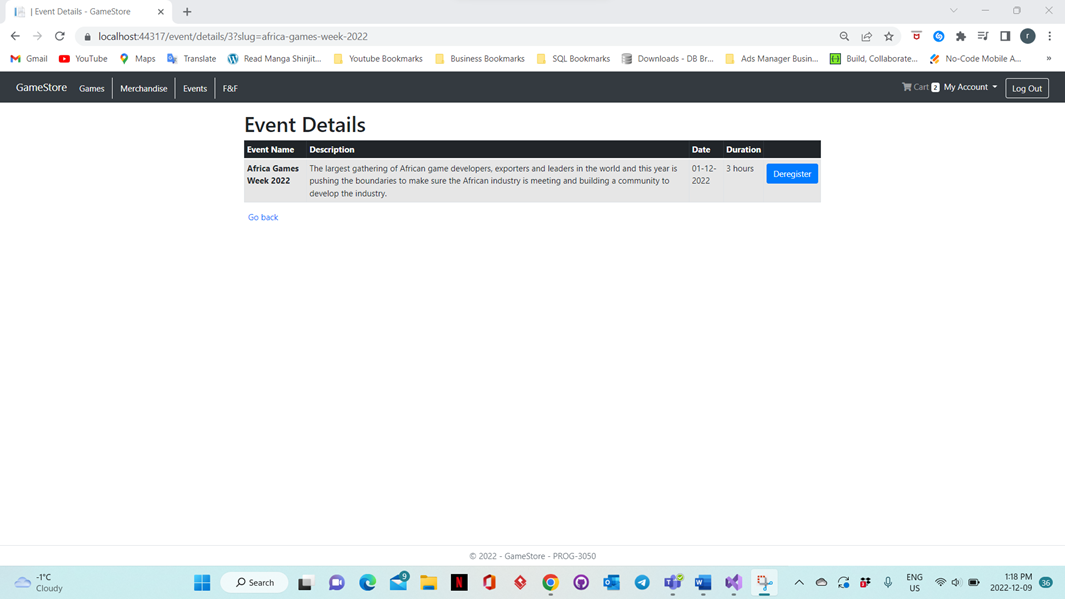
This is the page where you could see the details for the event in specifically to know what kind of your wanting to register into.
In this page also the buttons are worked as follows:
-
Register: This also allows the user to register into the specific event they want to get into it is the same as we had in our Event Catalog Page.
-
Deregister: This button is to undo any changes the user has made or has registered for the specific event. And does not allow to user/member to get into the event anymore nor receive any notifications. It also the same as we had in our Events Catalogue Page.
-
Go Back: This button allows user/members to go back to the Main /Events Catalog Page.

This is the navigation Bar which has all the button embedded functionalities. And these Buttons/Links Navigation works as follows:
-
Game Store: This navigates to our user/members Home Page which is also our Game Catalog Page.
-
Games: This also navigates to our user/members Home Page which is also our Game Catalog Page. It has the same navigation functionality as our Game Store Link.
-
Merchandise: This navigates to our main Merchandise Catalog Page.
-
Events: This navigates to our main Events Catalog Page.
-
F&F: This navigates to our Friend User’s Profile Page.
-
*Cart: This shows how many items are available on your cart now once start selecting items to be added to your cart as per instructions. By clicking this link, you can navigate to “Your Cart” Page. *
-
Whereas the “LOG OUT” Button logs the user/member out and navigates to the Log in Page
-
*My Account: This displays as a drop down once you click it you will be able to see these options: *
-
Profile Information: navigates to the user information panel page.
-
Preferences: navigates to your preferences page.
-
Addresses: they have a further drop down of two options one is Shipping Address, and the other is Mailing Address.
-
Payment Information: navigates to our “Your cards” Page.
-
Friends And Families navigates to your “Friends and Family” Page.
-
My Wish List: navigates to your own wish list page.
-
My Reviews: navigates to the Reviews Page.
-
My Events: navigates to the Event Catalog Page.
-
My Orders: navigates to the list of orders page.
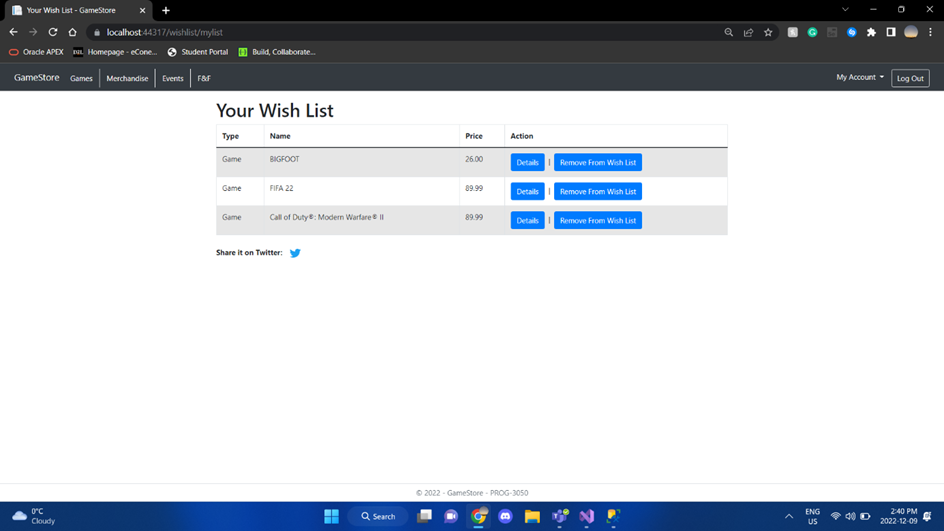
In this page all your wish list items are displayed together, and you are given the option to view the details or remove a Wishlist item.
In this page also the buttons are worked as follows:
-
Details: This button allows a user to view the details of about their wish list item like the name price and type.
-
Remove from wish list: This button allows a user to remove an item from their wish list.
-
Share it on Twitter: This button allows the user to share wish list items onto twitter.

In this page all your cards are displayed. You can add, edit, or delete a card.
In this page also the buttons are worked as follows:
-
Add card: This “Add” button has been made so because it allows a user to add new a card to the application.
-
Edit: The” Edit” button allows a user to edit card information on a current card.
-
Delete: The” Delete” button allows a user to delete a card and all its information from the application.
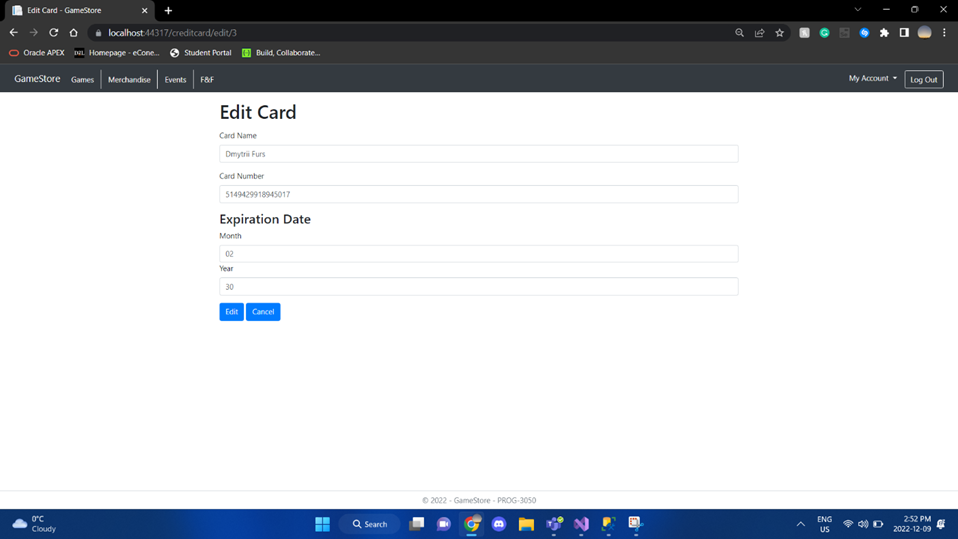
In this page you can edit all the information on your card.
In this page also the buttons are worked as follows:
-
Cancel: This button allows a user to go back and cancel editing their card information.
-
Edit: This “Edit” button allows a user to confirm the edit to their card information.

In this page you can confirm whether you want to delete a card or cancel.
In this page also the buttons are worked as follows:
-
Cancel: This “Cancel” button has been made available so that it allows a user to go back and cancel deleting their card.
-
Delete: This “Delete” button has been made available so that it allows a user to confirm the deletion of their card.

In this page all your Shipping Address is displayed.
In this page also the buttons are worked as follows:
-
Edit: The “Edit” button has been made available so that it allows a user to go back and cancel deleting their card.
-
Go to your mailing address: This “Go to your mailing address” button has been made available so that it allows a user to go back to the mailing address page.
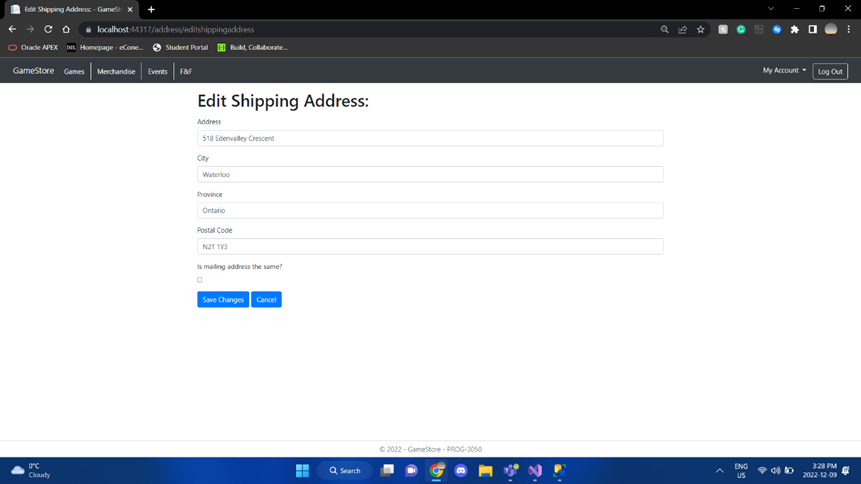
In this page you can edit your Shipping Address.
In this page also the buttons are worked as follows:
-
Edit: The
-
- “Edit” button has been made available so that it allows a user to go back and cancel deleting their card.
-
Cancel: This “Cancel” button has been made available so that it allows a user to go back and cancel editing their shipping address.
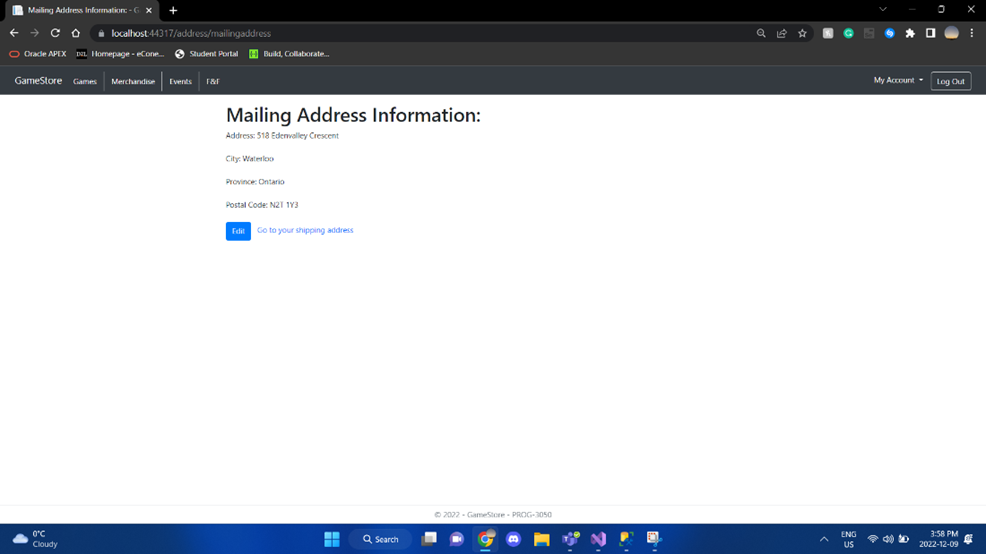
In this page all your Mailing Address is displayed
In this page also the buttons are worked as follows:
-
Edit: The “Edit” button has been made available so that it allows a user to go back and cancel editing their mailing address.
-
Go to your shipping address: The “Go to your shipping address” button has been made available so that it allows a user to go back to the shipping address page.
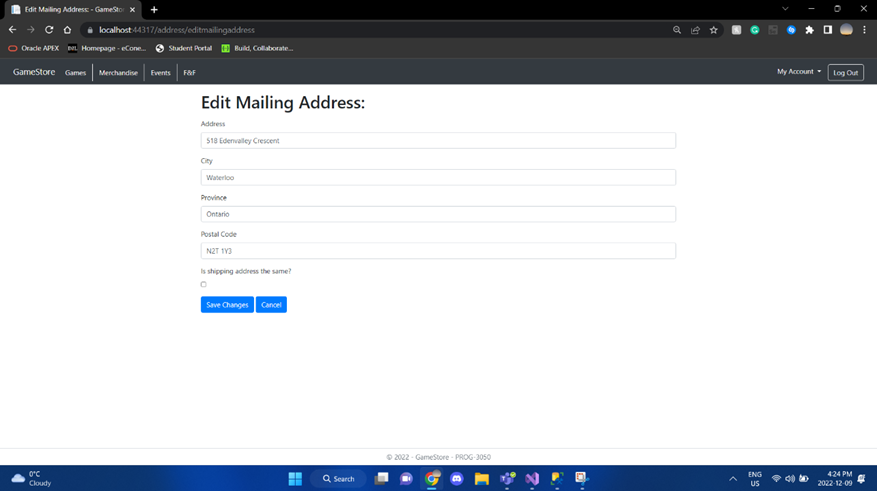
In this page you can edit your Mailing Address.
-
The “Save Changes” button has been made available for the information of the current user/member to edit their mailing address at any moment they wish to.
-
*Where as “Cancel” has been made to revert all the information as the user before modified it. *
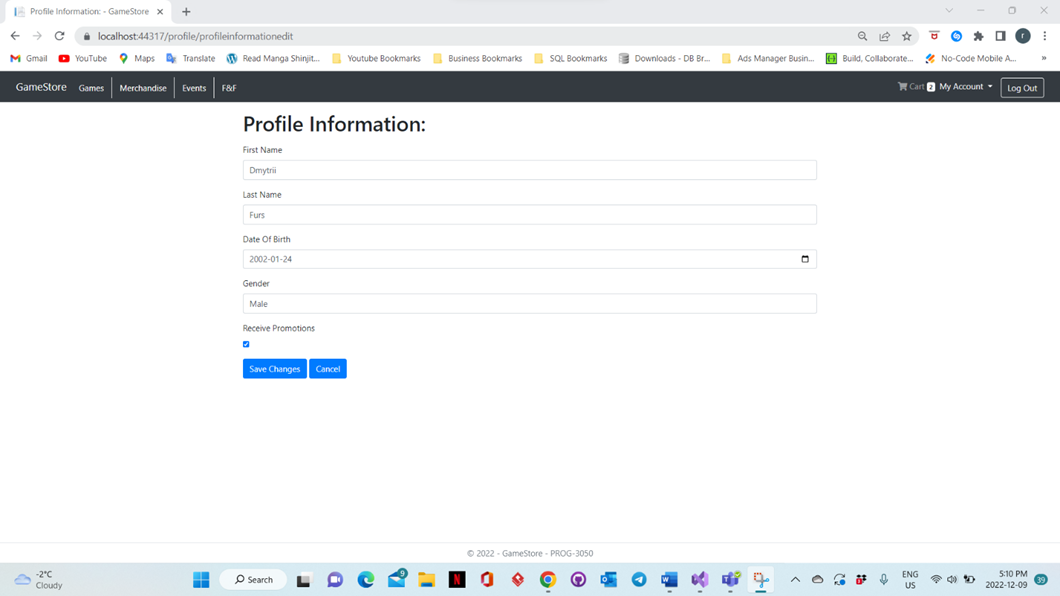
In this page the user / member could see their own details of their information and know about what information has been recorded previously.
-
The “Save Changes” button has been made available for the information of the current user/member to change at any moment they wish to.
-
*Where as “Cancel” has been made to revert all the information as it was before modifying your/user/member current details. *
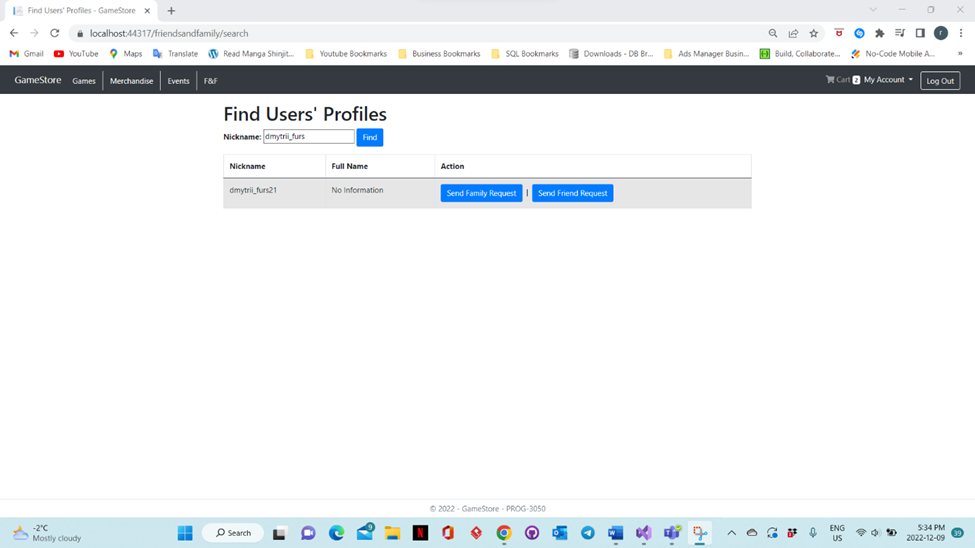
This page has been created for the current user to search for the user’s who has been our member for GAME ZONE. The User / member currently Logged In can search by their username/nickname.
-
The Button “Find” has the functionality only to search for existing members of our Game Zone Web Application. Once the user/ member types of the name, can click the button to find the specific user.
-
*Down below in the table the user will be displayed by their nickname, full name, and an action table area. *
-
Send Family Request: This sends request to the user as a Family request.
-
Send Friend Request: This sends request to the user as a Friend request.
-
Cancel Family Request: Once you have sent the request and search for the same name once again, you can also click the button cancel family request which will happen only if you send the user as a family request.
-
Cancel Friend Request: Once you have sent the request and search for the same name once again, you can also click the button cancel friend request which will happen only if you send the user as a friend request.
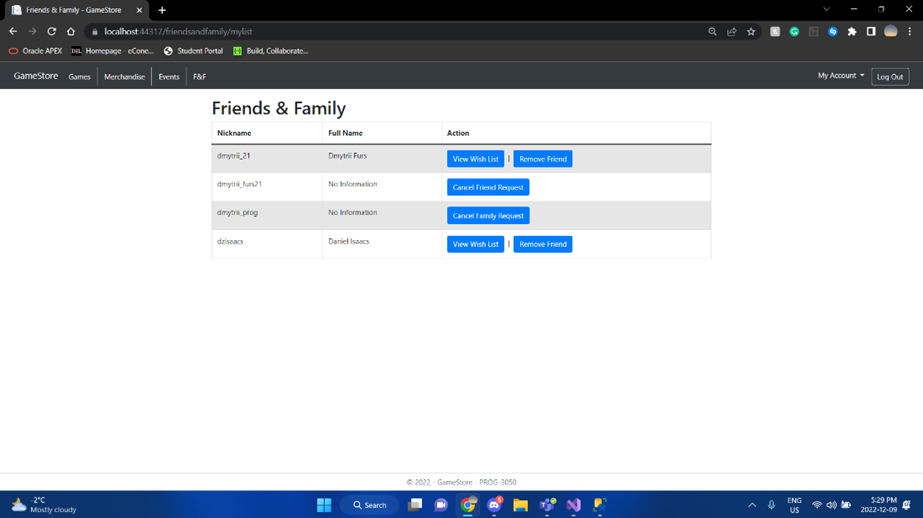
This page consists of all the users’ friends and family on the database where the user can choose whether they would like to cancel their family request, remove their friend, or view their friends & family wish list
The buttons Features would be:
View Wish List: The “View Wish List” button takes you to your wish list and you can view the content inside of it
Cancel Friend Request: The “cancel friend request” button cancels an existing friend request previously sent to another user
Remove Friend: The “Remove Friend” button removes an existing friend of your friends list
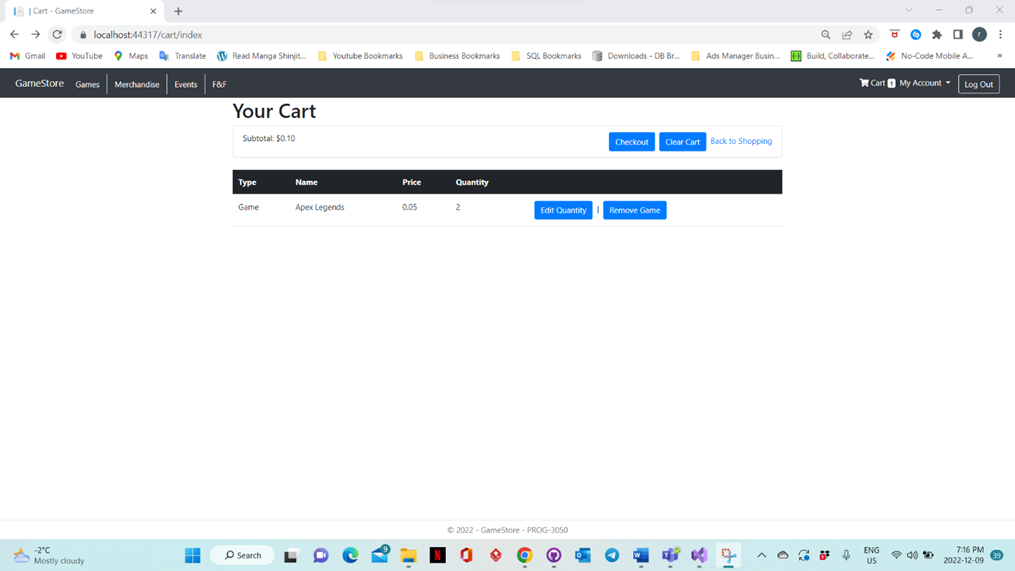
This page shows all the items which the user has selected to view all
the information regarding the game or merchandise they chose, so we have
here, Type, Name, Price, and Quantity.
There are also some action buttons as follows:
-
Checkout: This takes or navigates user/member to the checkout page.
-
Clear Cart: This clears all the selected item added to the cart by user/member.
-
Back To Shopping lets us navigate to our Game Catalog/ Home Page.
-
Edit Quantity navigates us to the “Edit Quantity” Page. Where user can edit their info.
-
Remove Game/Remove Merchandise: Lets us to remove merchandise or game from the cart according to the user specification.
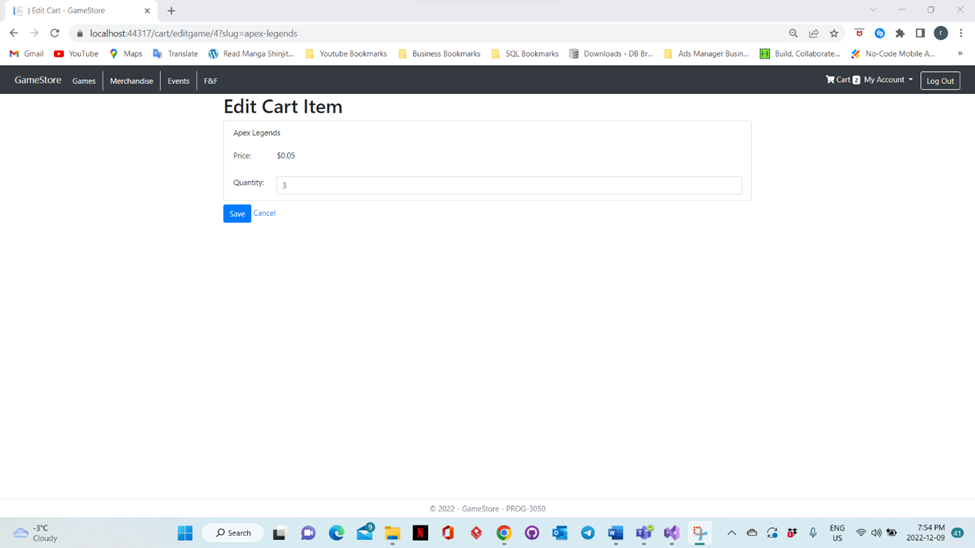
In this page users will be editing the amount of quantity they wish to purchase later. And The Quantity also has a limit which is having a MAXIMUM OF 10.
The Buttons above works as follows: =
-
*Save: After the user makes some changes to their quantity of items, they wish to change it to. The system saves it in the database and then helps user to navigate to the “Your Cart Page.” *
-
Cancel: This allows the user/member to redo all the option to previous default information.
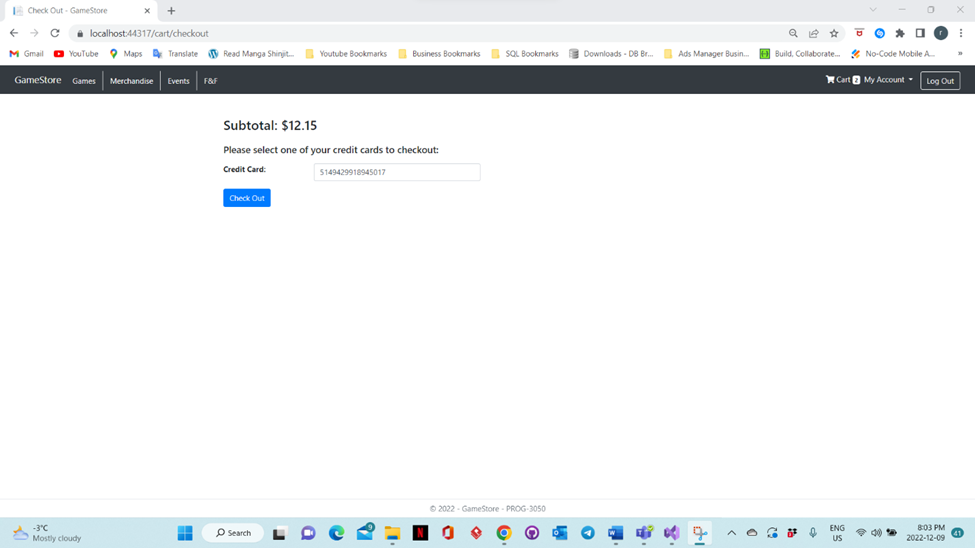
In this page we have our check out subtotal which will add up to how many items we have selected on our “Your Cart” Page.
It also asks for the Credit Card Number which also has validation to check and see if the credit card is Valid or Invalid.
- Checkout: Once the user/member clicks the checkout button the user goes back to the “Your Cart Page” as the system navigates them. And saves the credit card information as follows.
 {width="7.068779527559055in"
height="3.9761898512685914in"}
{width="7.068779527559055in"
height="3.9761898512685914in"}
This page is like what we have for our user Home Page/ Game Catalog
Page. The Admin Can filter the games out to search for a specific game.
Also, there is Clear button which helps Admin to remove all the filtered
options to Default Value.
The only changes occurring in the admin “Game Catalog” Page is that it
had three extra buttons.
-
Edit: Navigates the user/member to the “Edit Games” Page where admin can change the details of the specific game.
-
Add a Game: Navigates the user/member to the “Add Games” Page where admin can add the further details of the specific game the wish to add.
-
Delete: Helps the admin to remove any specific game which is not needed for the admin anymore.
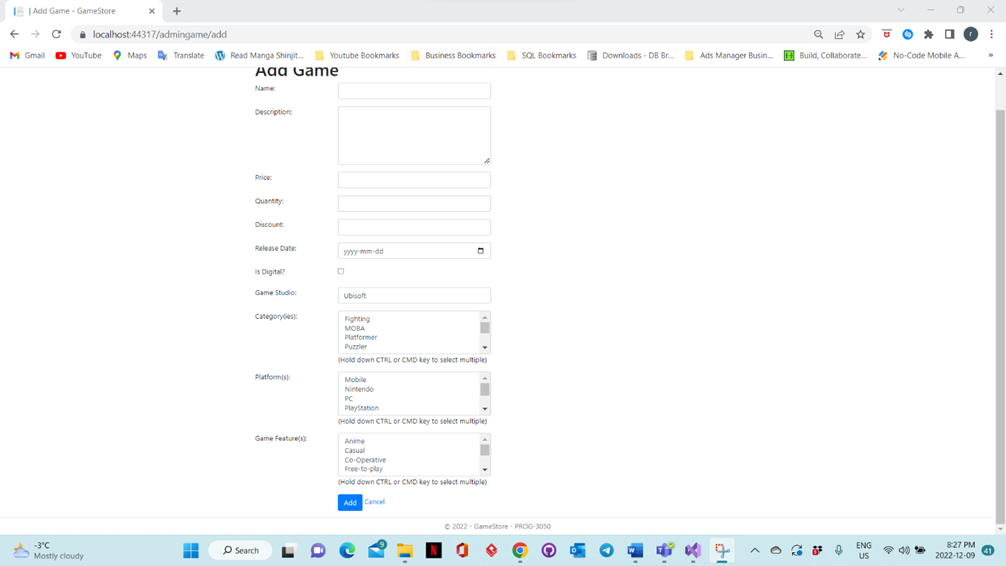
In this page Admin can add a new set piece of information. In which you have validations. The required fields for this are all of them except for discount tab and the check box which says, “Is Digital?”
The Buttons also works as follows:
-
*Add: This allows the admin to add the new game which the admin filled out the above listed information for, also navigates back to the “Game Catalog” Page. *
-
Cancel: Lets the admin to restore all fields or tabs back to their DEFAULT Values, also navigates back to the “Game Catalog” Page.
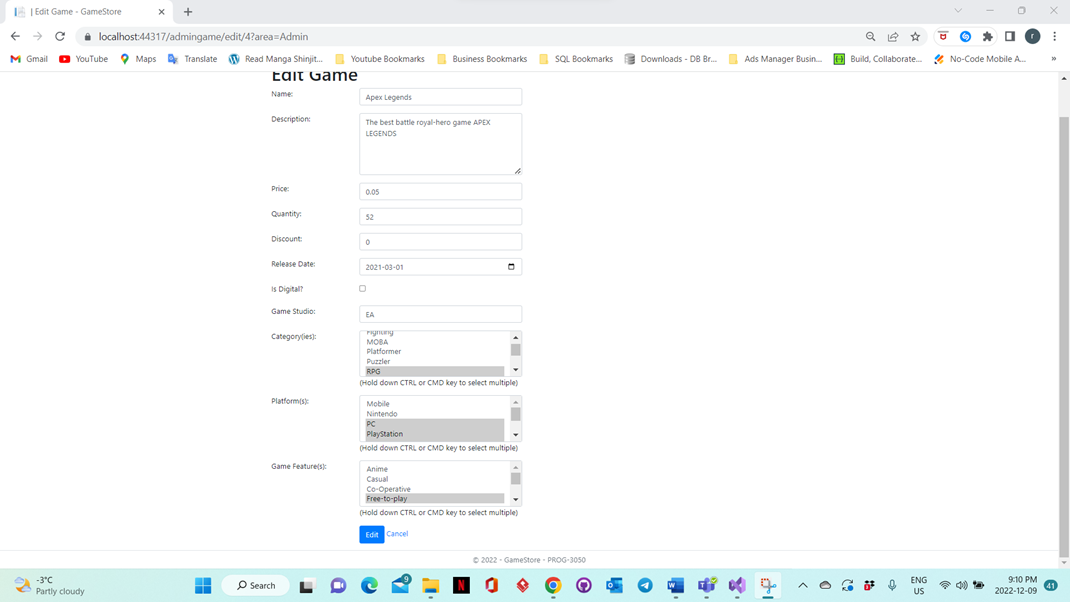
In this page Admin can Edit the existing information. In which you have validations. The required fields for this are all of them except for discount tab and the check box which says, “Is Digital?”
The Buttons also works as follows:
-
*Edit: This allows the admin to edit the existing game which the admin filled out the above listed information for, also navigates back to the “Game Catalog” Page. *
-
Cancel: Lets the admin to restore all fields or tabs back to their DEFAULT Values, also navigates back to the “Game Catalog” Page.
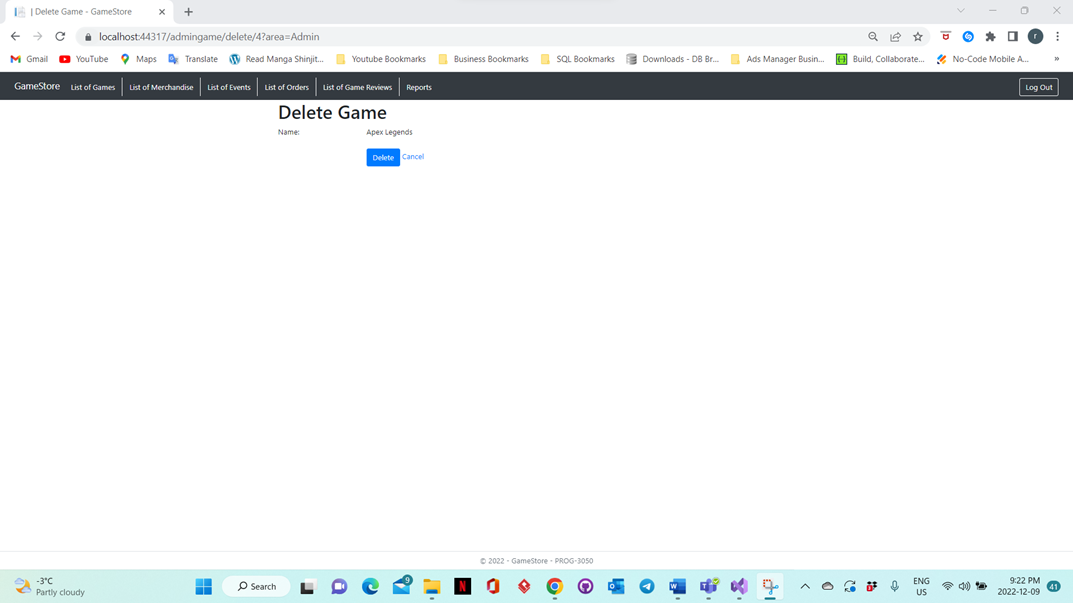
In this page the admin can DELETE the specific game he wishes for in
this case we have” Apex Legends.”
The buttons Features would be:
-
Delete: This allows admin to delete the record from the database and make it unable to view it in the web Application as well. Also navigates back to the Game Catalog Page, showing that the procedure has been done.
-
Cancel: This allows the user to navigate back to the Game Catalog Page without making any unnecessary changes.
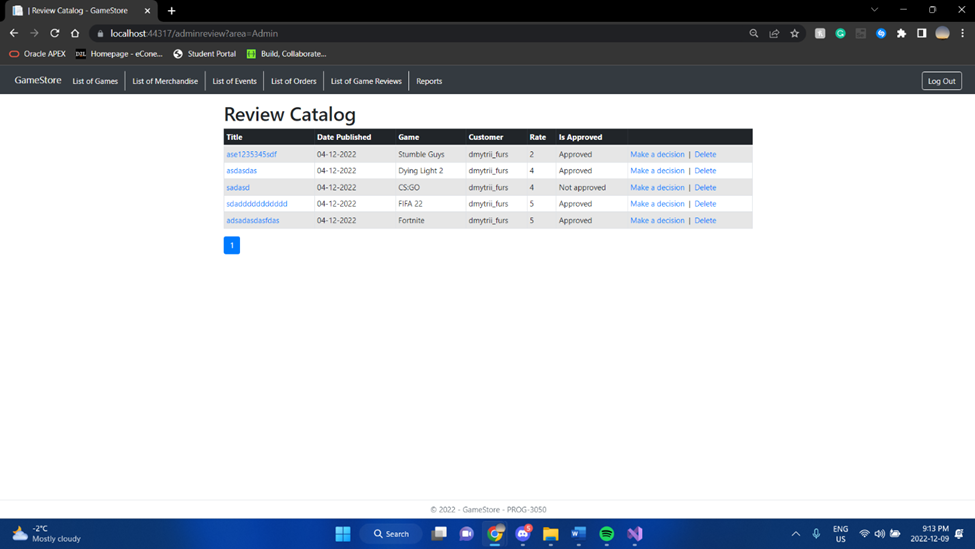
In this page the admin can view Reviews and delete reviews as well as decide.
The buttons Features would be:
-
Decide: The” Decide” button puts the admin on the Review approval page where he would have an option whether he wants to edit the review or cancel it completely
-
Delete: The “delete” button in the review catalog page is used to delete any reviews in the review catalog page and remove it completely from the database.
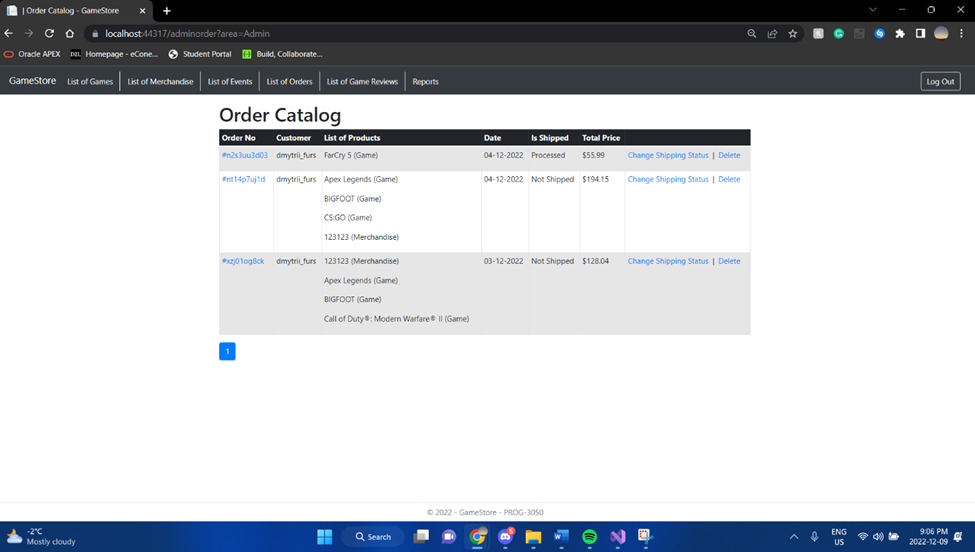
In this page the admin can view order catalog page and delete any orders placed in addition change the shipping status for a specific order that the admin chooses.
The buttons Features would be:
-
Change shipping status: The” Change shipping status” button puts the admin on the Order processing page where them would have an option whether he wants to edit the order or cancel it completely.
-
Delete: The “delete” button in the order catalog page is used to delete any orders in the order catalog page and remove it completely from the database.
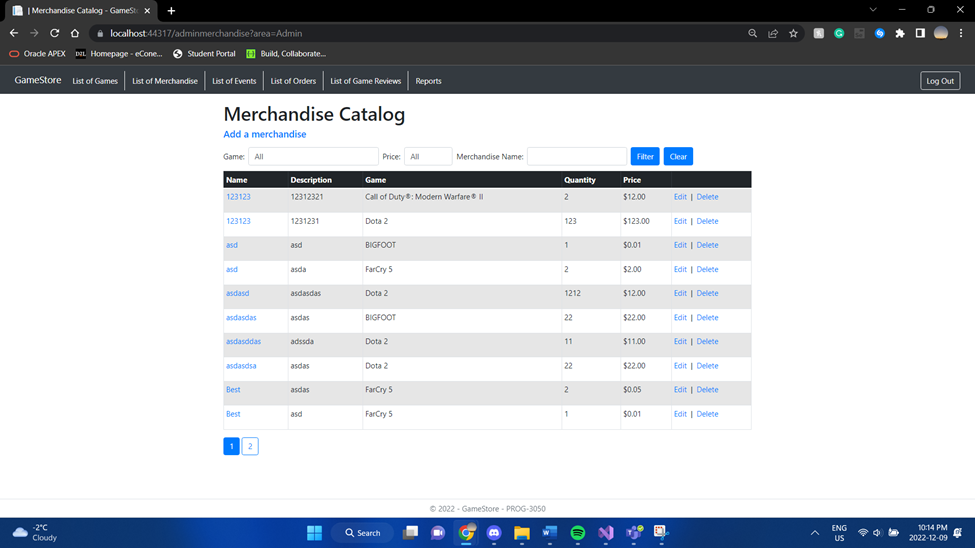
In this page the admin can view the merchandise catalog page and delete any item of merchandise in addition edit any item of merchandise and add any item of merchandise.
The buttons Features would be:
-
Edit: The “Edit” button in the event catalog allows the admin to edit an event by the admin only
-
Delete: The “Delete” button in the event catalog allows the admin to delete an event from the event catalog
-
Add Merchandise: The “Add Merchandise” button in the event catalog gives the admin exclusive benefits to being able to add a new merchandise to the merchandise catalog.
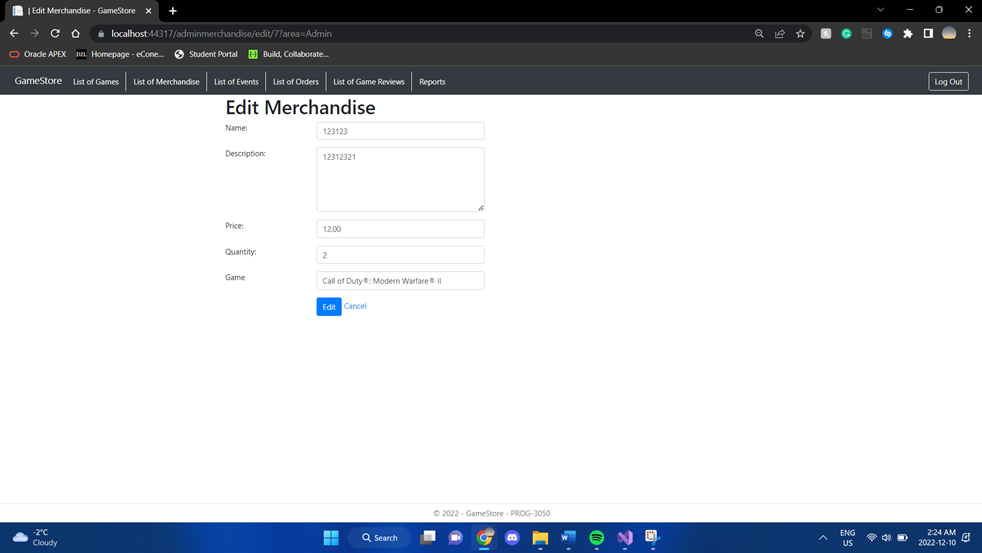
In this page the admin can view the merchandise and edit any item of merchandise or press the “cancel” and nothing will happen.
-
*Edit: The “edit” button confirms all the changes that the admin decides to put into the merchandise catalog page. *
-
*Cancel: The “cancel” button cancels all the edits made to an item of merchandise and takes the admin back to the merchandise catalog page. *
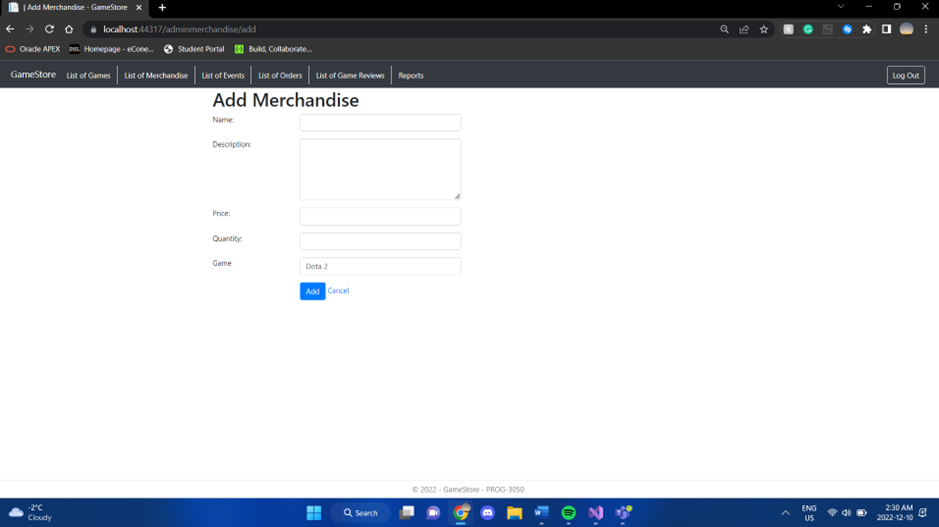
In this page the admin has a couple fields to fill in to add a new item of merchandise or if the admin chooses to cancel, he can click the cancel button or the add button to add a new item of merchandise.
The buttons Features would be:
-
*Add: The “Add” button is the final conformation of the addition of an item of merchandise once the button is pressed the merchandise is added permanently. *
-
*Cancel: The “cancel” button cancels the addition of the merchandise and takes the admin back to the merchandise catalog page. *
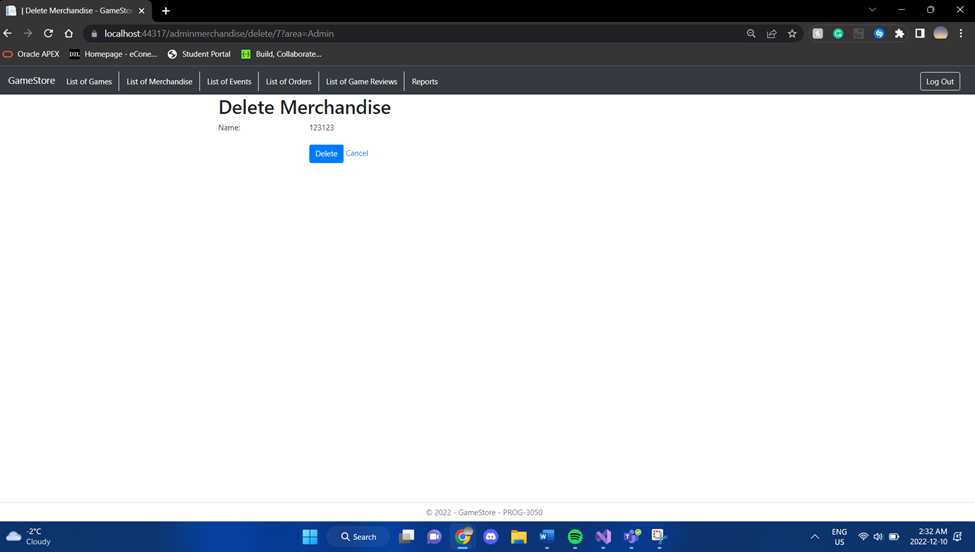
In this page the admin has two choices one being the confirm the deletion of an item of merchandise or cancel all together and go back to the previous page
The buttons Features would be:
-
*Delete: The “delete” button is the final conformation of the deletion of an item of merchandise once the button is pressed the merchandise is deleted permanently. *
-
*Cancel: The “cancel” button cancels the deletion of merchandise and takes the admin back to the merchandise catalog page. *
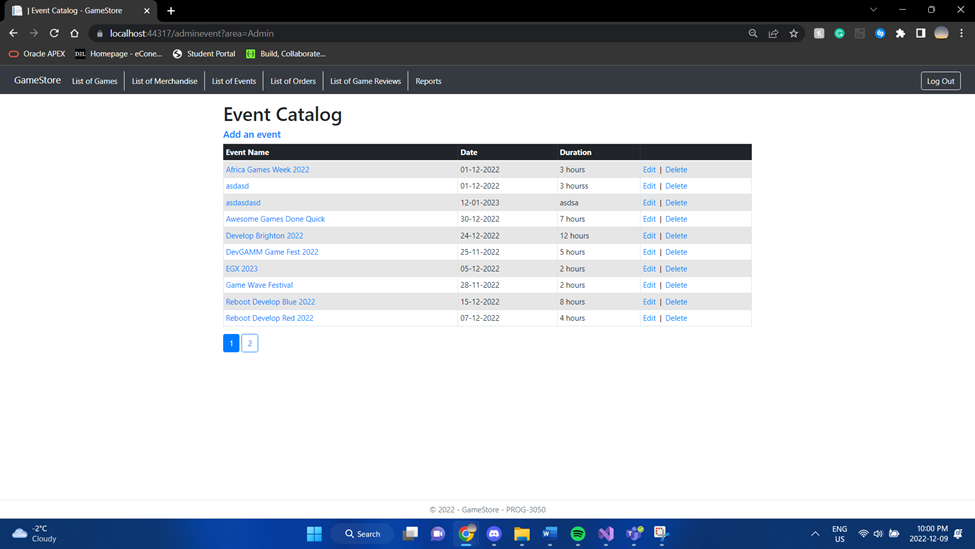
In this page the admin can view the event catalog page and delete any item event in addition edit any item of an event, delete any item of an event, and add any events.
The buttons Features would be:
-
*Edit: The “Edit” button in the event catalog allows the admin to edit an event by the admin only *
-
*Delete: The “Delete” button in the event catalog allows the admin to delete an event from the event catalog *
-
Add an Event: The “Add an event” button in the event catalog gives the admin exclusive benefits to being able to add a new event to the event catalog.
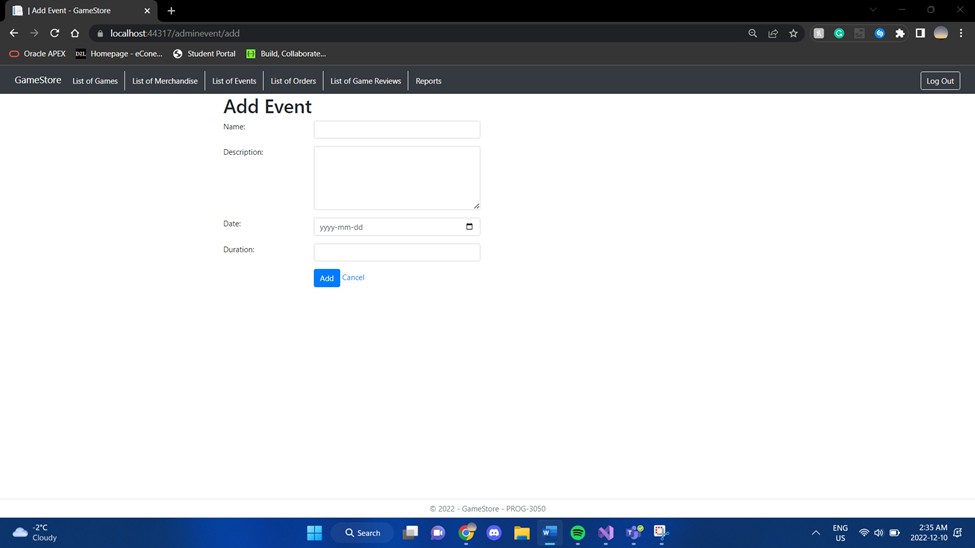
In this page the admin has a couple fields to fill in to add a new event or if the admin chooses to cancel, he can click the cancel button or the add button to add a new event.
The buttons Features would be:
-
*Add: The “Add” button is the final conformation of the addition of a new event being added once the button is pressed the event is added permanently. *
-
*Cancel: The “cancel” button cancels the addition of the event and takes the admin back to the event catalog page with nothing being added to the event catalog page. *

In this page the admin can view the event and edit any item of the event or press the “cancel” and nothing will happen.
The buttons Features would be:
-
*Edit: The “edit” button confirms all the changes that the admin decides to put into the event catalog page. *
-
*Cancel: The “cancel” button cancels all the edits made to an event and takes the admin back to the event catalog page. *
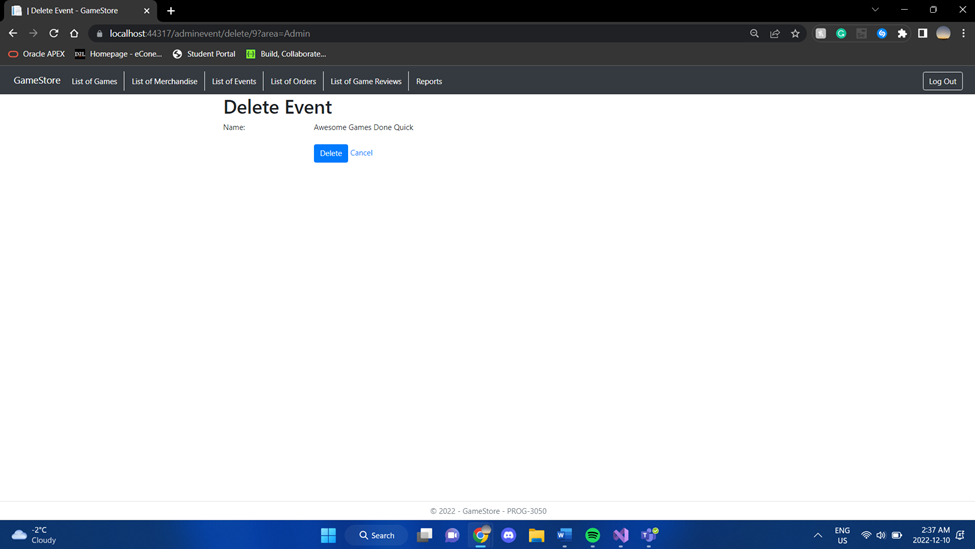
In this page the admin has two choices one being the confirm the deletion of an event or cancel all together and go back to the previous page
The buttons Features would be:
-
*Delete: The “delete” button is the final conformation of the deletion of an event once the button is pressed the event is deleted permanently. *
-
*Cancel: The “cancel” button cancels the deletion of an event and takes the admin back to the event catalog page. *
Review approval Page (ADMIN)
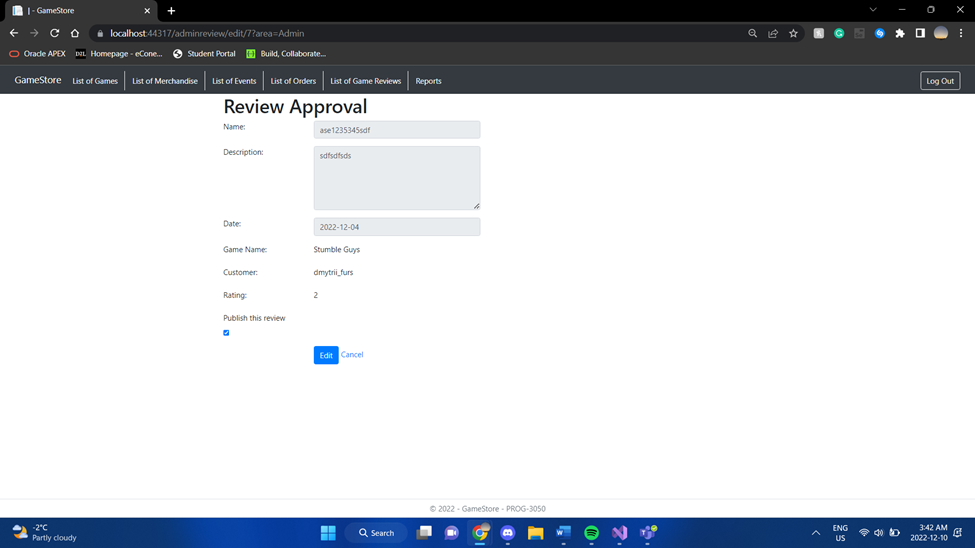
In this page the admin can view the review and edit any aspect of the review or press the “cancel” and nothing will happen.
The buttons Features would be:
-
*Edit: The “edit” button confirms all the changes that the admin decides to put into the review and updates the review catalog page. *
-
*Cancel: The “cancel” button cancels all the edits made to the review and takes the admin back to the review catalog page. *
Delete Review Page (ADMIN)
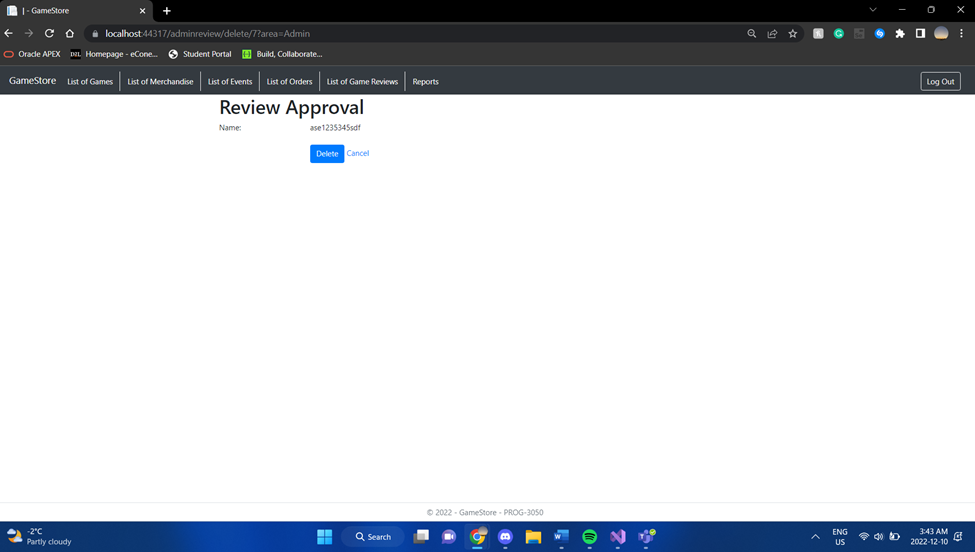
In this page the admin can confirm the deletion of a review or choose to cancel the deletion process.
The buttons Features would be:
-
*Delete: The “delete” button is the final conformation of the deletion of a review once the button is pressed the review is deleted permanently. *
-
*Cancel: The “cancel” button cancels the deletion of a review and takes the admin back to the review catalog page. *
Order Processing Page (ADMIN)

In this page the admin can either choose to edit an order which is being processed by editing aspects of the order or cancel the editing process all together
The buttons Features would be:
-
*Edit: The “edit” button confirms all the changes that the admin decides to put into the order and updates the order catalog page. *
-
*Go back: The “go back” button cancels all the edits made to the order and takes the admin back to the order catalog page with no changes being made. *
Delete Order Page (ADMIN)
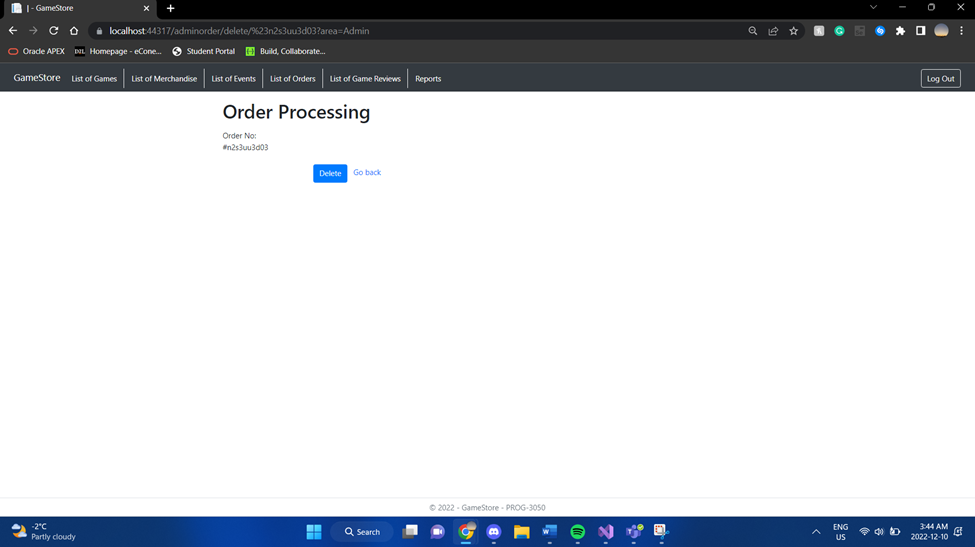
In this page the admin can confirm the deletion of an order or choose to cancel the deletion process.
The buttons Features would be:
-
*Delete: The “delete” button is the final conformation of the deletion of an order once the button is pressed the review is deleted permanently. *
-
*Cancel: The “cancel” button cancels the deletion of an order and takes the admin back to the order catalog page. *
Report Generator Page (ADMIN)
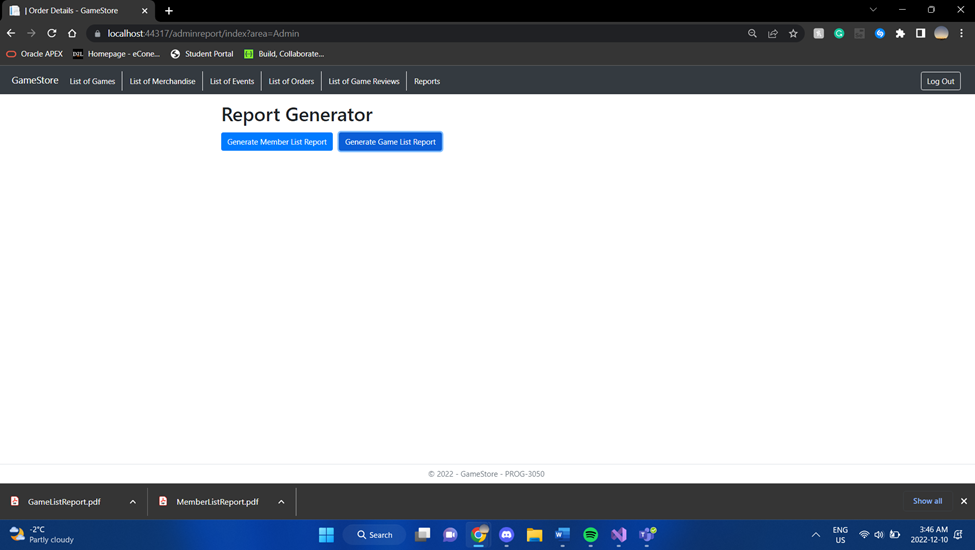 height="3.6694444444444443in"} In this page the admin can generate two
types of reports one being the member list report and other being a game
list report
height="3.6694444444444443in"} In this page the admin can generate two
types of reports one being the member list report and other being a game
list report
The two buttons work as follows:
-
Generate member list report: The “generate member list report” allows the admin with a push of a button to generate the entire member list from the database and have a pdf version of it saved to their workstation.
-
Generate game list report: The “generate game list report” allows the admin with a push of a button to generate the entire game list from the database and have a pdf version of it saved to their workstation.